Drones such as the Ryze Tello and other DJI drones have a number of built-in sensors and devices that enable stable and smooth flight. In order for these to function properly, it is necessary to calibrate them from time to time. You may have received a request in the drone app to calibrate the “IMU”. In this article we will explain what this is all about and how to perform the calibration in the Tello App so that you can fly on quickly. We also explain what you should pay attention to regarding the operating temperature and the correct propeller mounting.
Why calibrate Tello’s IMU?
Have you ever wondered how a drone maintains its horizontal position? The “inertial measurement unit” (IMU for short) is an assistance system built into your Tello drone that measures the speed, angular velocity and position of the drone. It ensures that the drone maintains its orientation towards the ground by itself and does not drift. So if you notice that your Tello is slightly hovering to the side or flying at an angle, it is time to calibrate the IMU. The IMU is equipped with a gyroscope that detects the inclination of the drone. Also included is a barometer for measuring altitude and a thermometer that measures changes in temperature. Another important component is an acceleration sensor.
You should definitely calibrate your Tello drone at the following signs:
- A request regarding IMU has been displayed in the Tello app.
- Your drone drifts to the side by itself or hangs in the air at an angle.
- The Tello has to warm up for a long time before take-off.
It is also a good idea to perform an IMU calibration for the Ryze Tello if you have just unpacked it or have done a firmware update. Calibration is also recommended after a severe crash.
What is to be considered?
The built-in thermometer remembers the temperature at which the IMU calibration was performed. If you want to fly after the calibration, the drone warms up first. Therefore it is important that the drone is not placed on e.g. underfloor heating for calibration, because otherwise there is a big difference to the outside temperature. Furthermore, the battery should be at least 50% charged. A checklist for the start:
- Smooth, flat surface available for calibration
- Do not place on heated surface / underfloor heating
- Battery of the drone is at least 50% charged
- The Tello app is installed on your smartphone or tablet
- The Tello has received the latest firmware update
Attention: The Tello has an exclusively passive cooling system. It only cools down during flight. If the drone is switched on too long without flying, it can overheat. In case of overheating the Tello switches off automatically. Therefore you should not take too much time with the calibration and only switch on the drone when it is really necessary. Calibration takes about five minutes. We will of course consider this in our step-by-step instructions.
First steps before calibrating
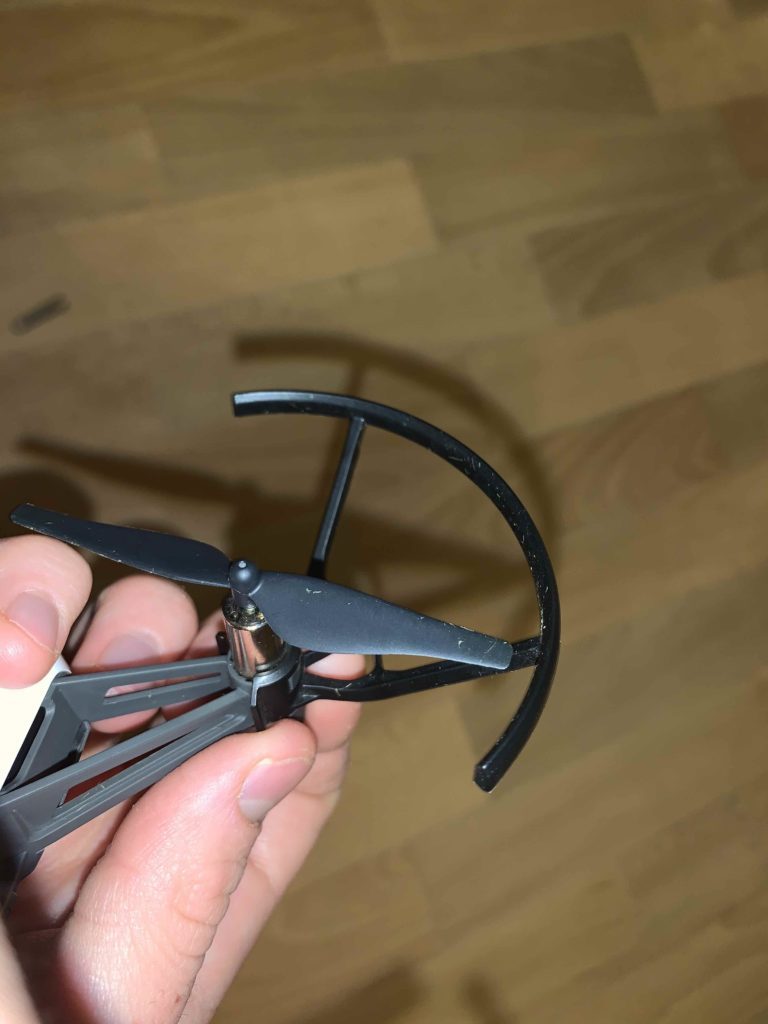
The drone can remain switched off for the first steps. First remove the propeller guards. You can do this easily with your fingers by pushing the clip to the side. Repeat this for all four propeller protectors and put them aside.
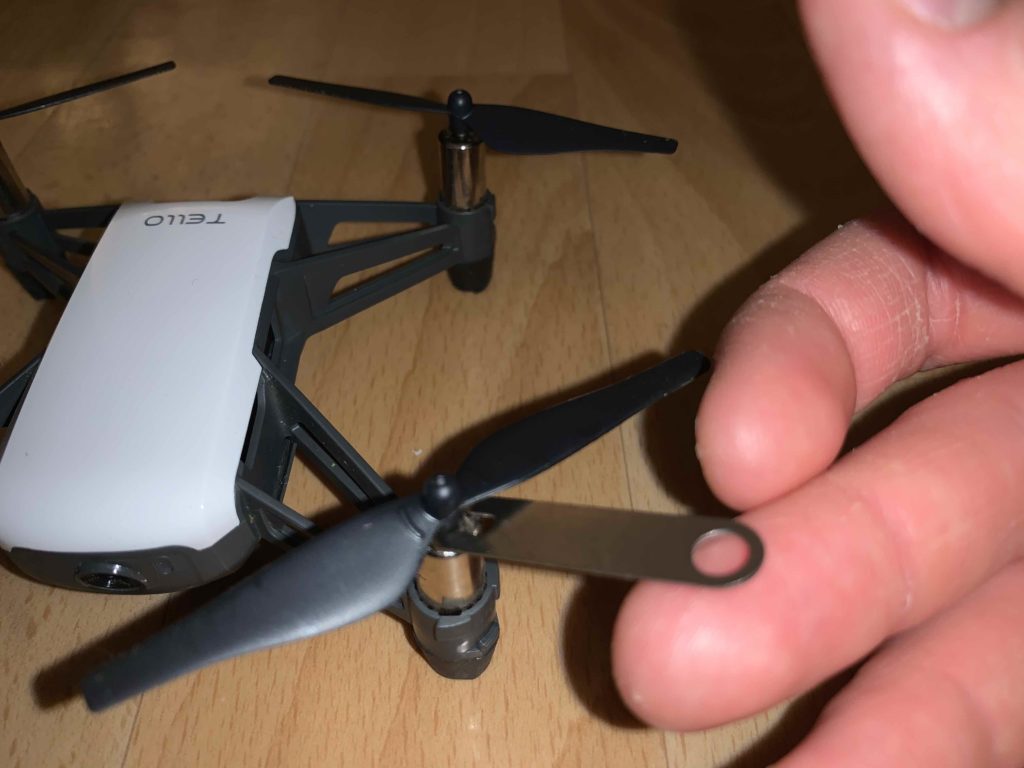
Then you have to remove the propellers of the Tello. Use the tool included in the delivery:
To do this, place the teeth of the tool between metal and plastic and use the leverage effect by pushing down. The propellers can then be removed without much effort.
Attention: The propellers have to be remounted later in a certain way so that they turn in the right direction. At the end of the article after the calibration we will go into this.
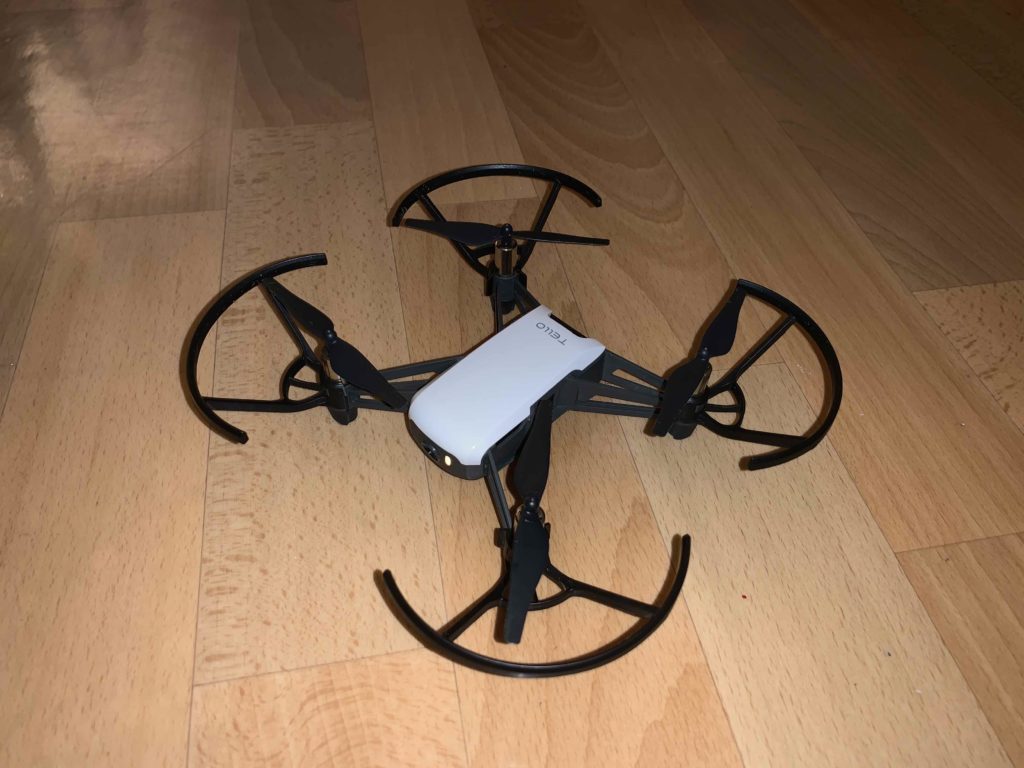
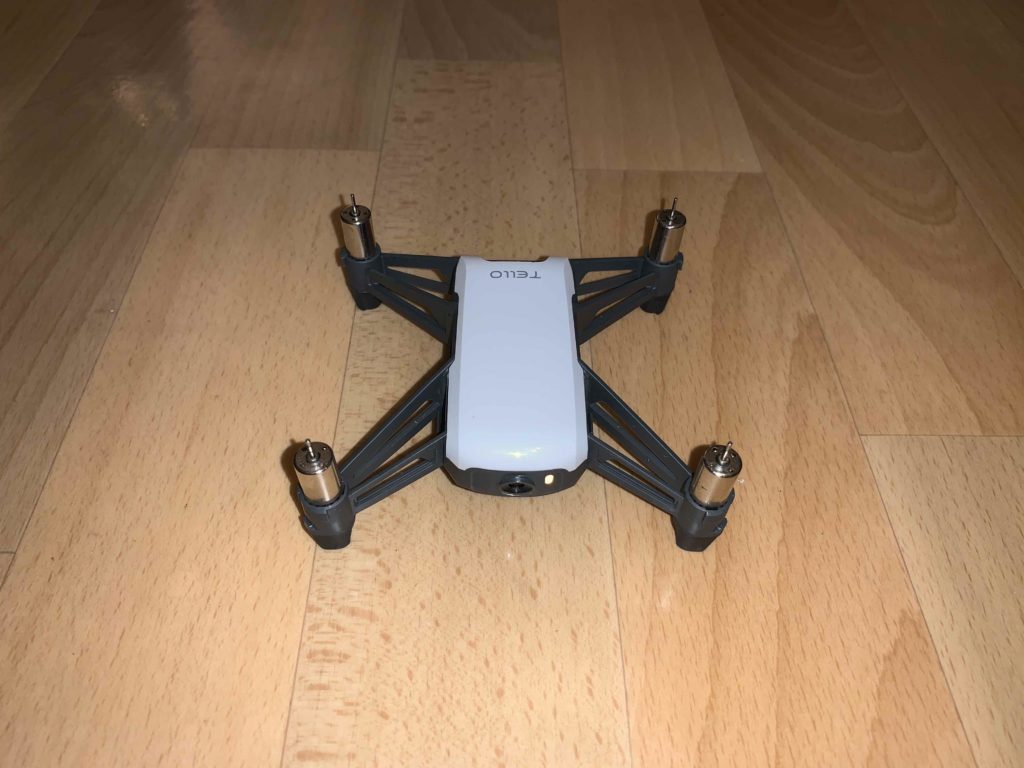
Then place the Tello without propeller protector and propeller in front of you on a flat surface to have a stable position for calibration:
IMU calibrating the Tello
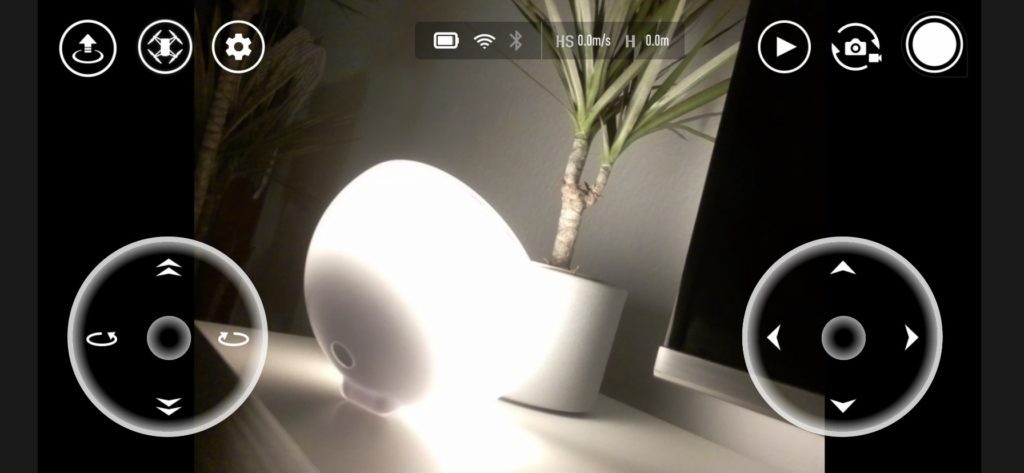
Now switch on your Tello and connect to the Tello app via WiFi as usual. When the picture of the drone camera is displayed, you can start.
This is how you have to click through the menu to get to the calibration: First, touch the gear wheel in the upper left corner. Then click on “More” (bottom right). Then select the dots (“…”) on the left side to get to the advanced settings. Then you will find the calibration function in the upper right corner:
1.) Touch the small gear 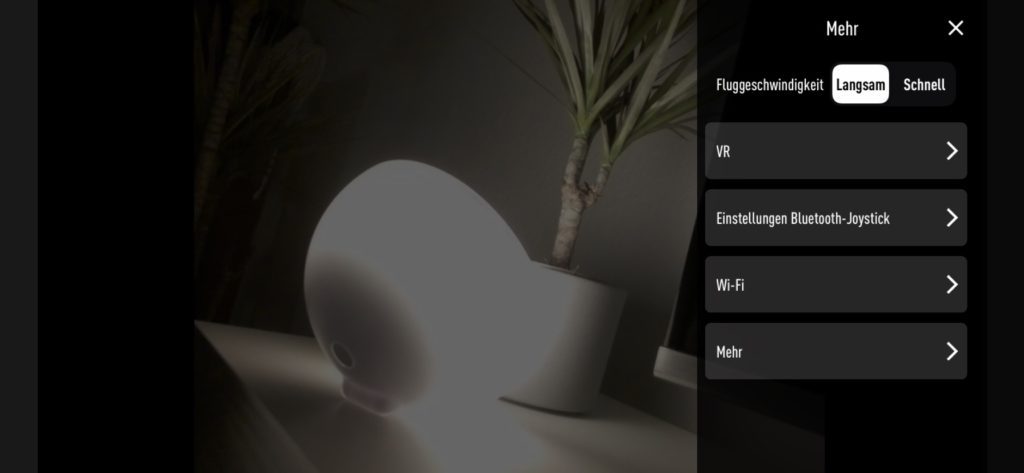
2.) Press “More” 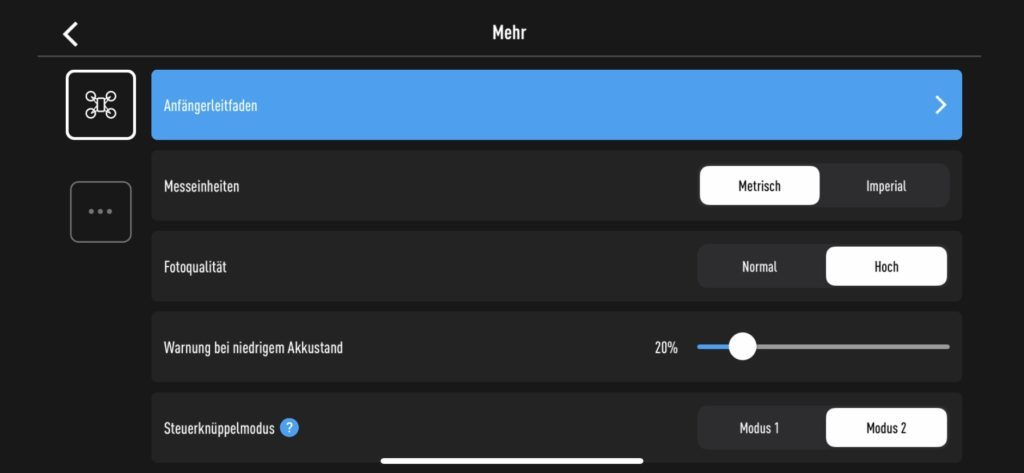
3.) Press “…” 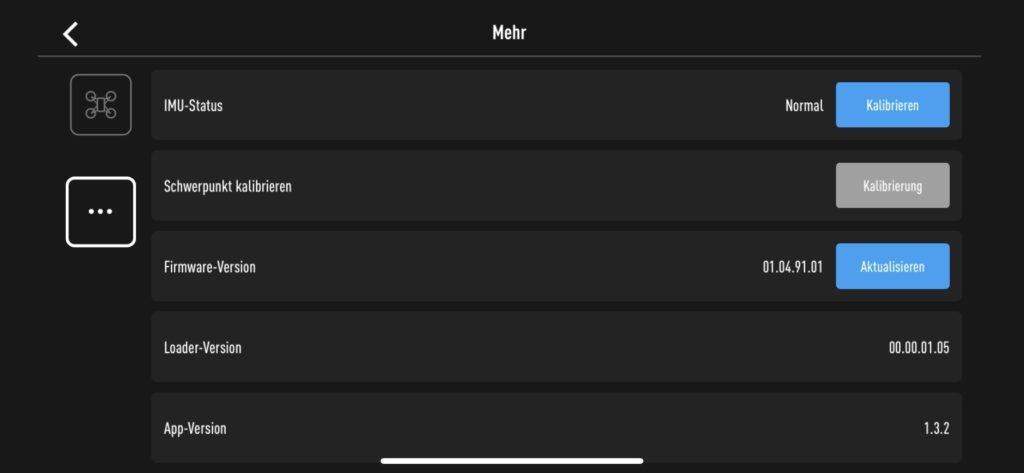
4.) Press “Calibrate”
You will then be asked to move the drone into different positions. The starting position is the usual take-off position. After clicking on “Start” the process begins. All you have to do is follow the instructions:
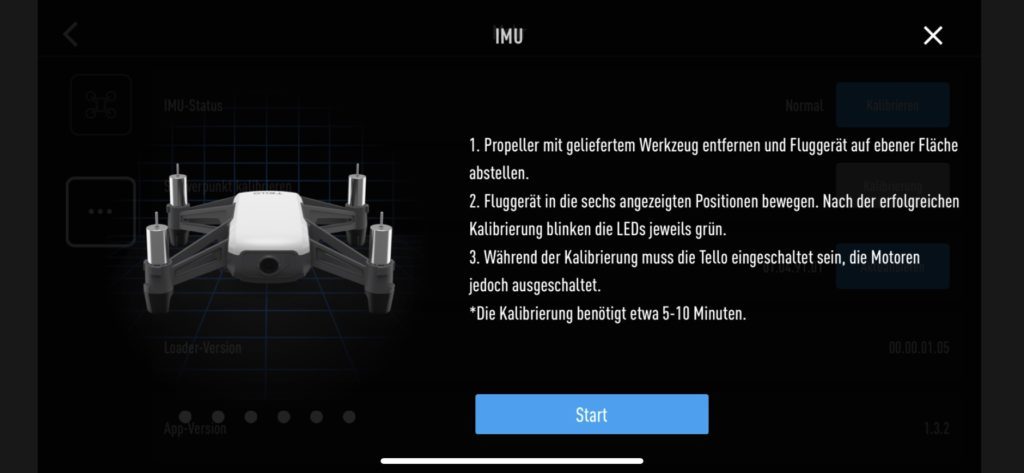
Press “Start” 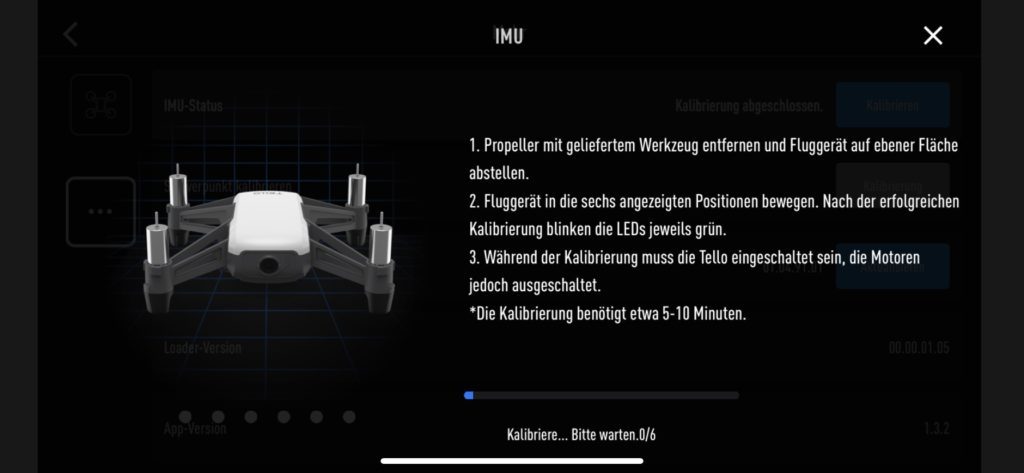
Don’t move the drone 
Reposition the drone as shown in the image 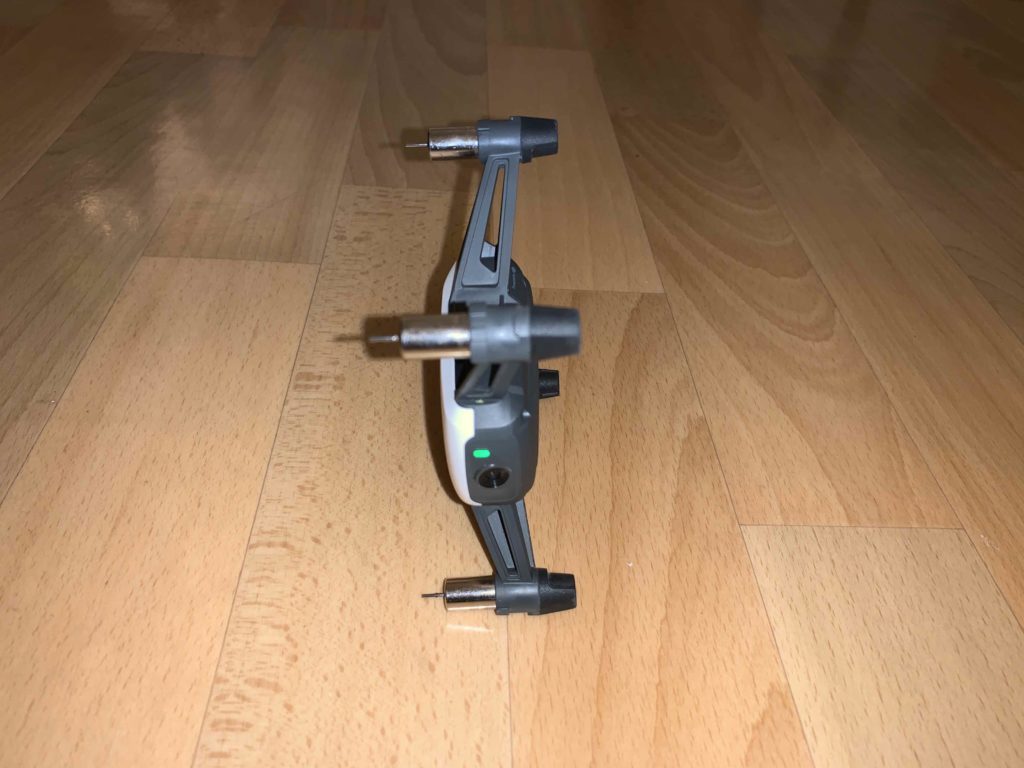
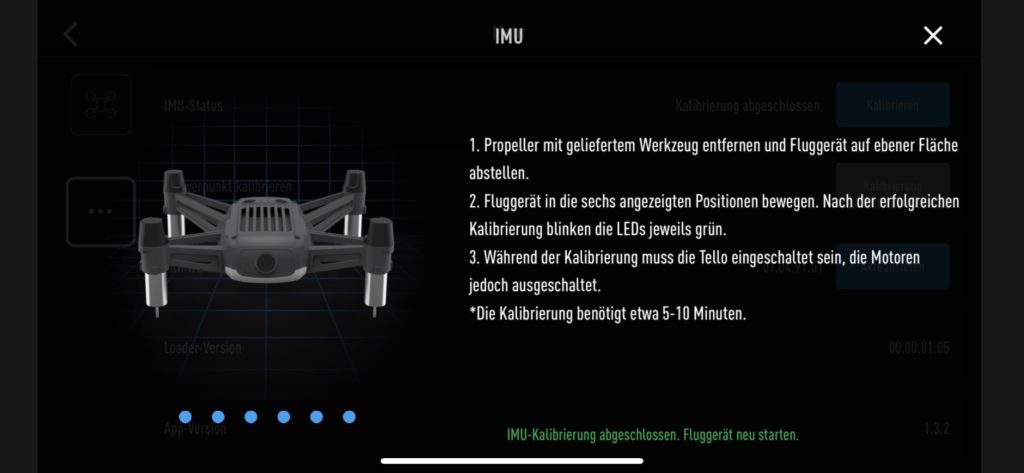
In our picture gallery we show only one of the different positions you have to move the drone into. After you have placed the drone in the position the app requires, do not move it until you receive a new request. With the message “IMU calibration completed. Restart aircraft.” you are now complete. Great! Now restart the drone as requested and switch it off afterwards to avoid overheating of the technical components.
Important: How to mount the Tello propellers
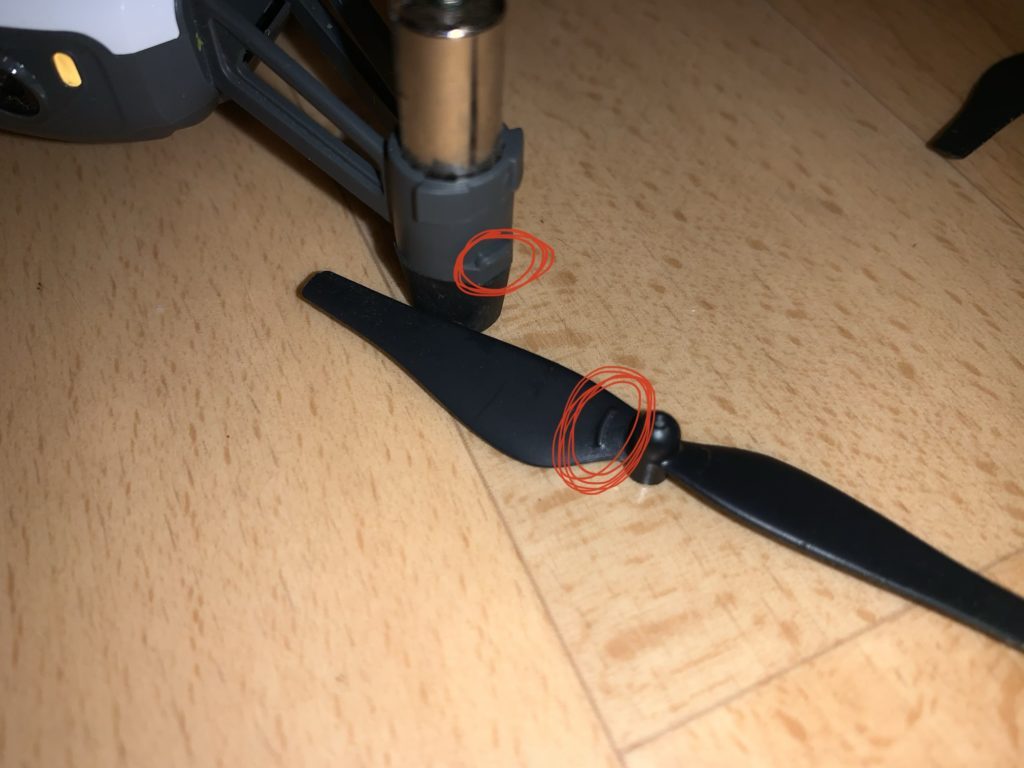
To reinstall the propellers and get the drone ready to fly, the correct position of the propellers is very important. On two feet of the drone and on two propellers you can see a small elevation. The propellers with the elevation (marked red) must be mounted on the rotors, whose feet also have a mark. This is very important, because quadrocopters need these propeller arrangements for flight.
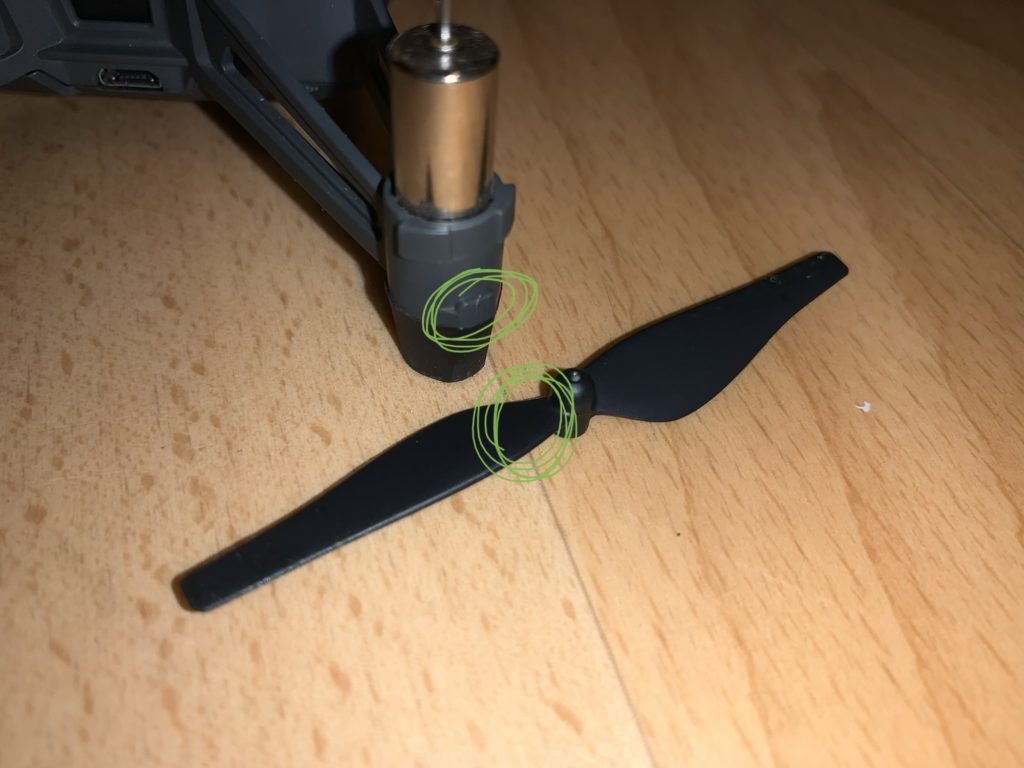
You can simply press the propellers onto the pins with your fingers. Afterwards the propeller protectors must be attached. These can be snapped into the elevations on the outside of the drone’s feet.
We hope this article has helped you and you have successfully calibrated your Ryze Tello. Have fun flying!
By the way: We wrote an article about how you can significantly extend the maximum flight range and altitude of the Tello. Since the Tello connects to the control system via WiFi, range and altitude are usually very limited. We show you how you can easily extend them.